As new employees join and others exit the business, it’s important to keep your user accounts up to date. That way you know everyone who needs access to Kendo has access. It also ensures your reporting is accurate and not based on data from employees that have left the business.
Invite New Users
- Users can be added in bulk using an import process or can be added one by one
- Once added, they can then be invited to create a password and log into their account
Adding users – Using an Excel import
- Select Import and Using Excel to download an excel spreadsheet to add new users
- Add new user details to the Users tab
- Mandatory fields need to be completed for the users to be successfully imported (First Name, Last Name, Email Address)
- All other fields are optional and can be added to the user’s profile after the upload
- Save the completed spread sheet onto your desktop
- Browse to find the file
- Confirm the import
- You’ll be advised how many new users have been successfully imported
- Invite users to create their Kendo password under Manage Users
- Filter on Status and Not Invited – and then send Invitation Emails to all or invite users individually from their profile
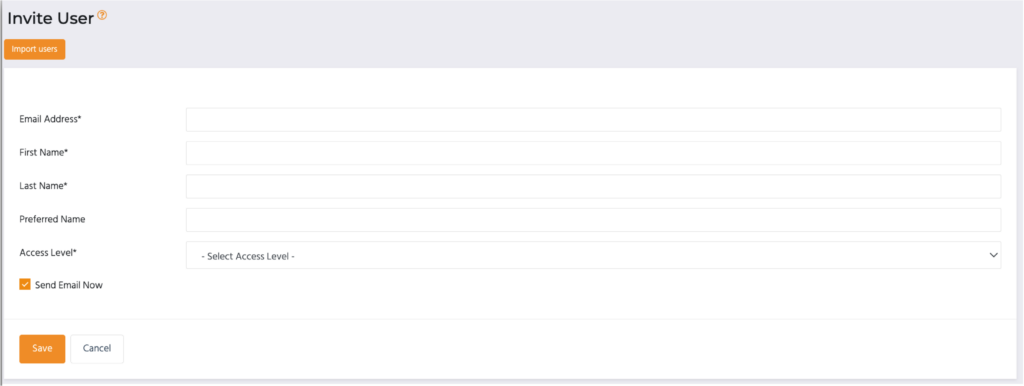
Adding users – One by one
- To create a new user account add their email address, name and who they report to.
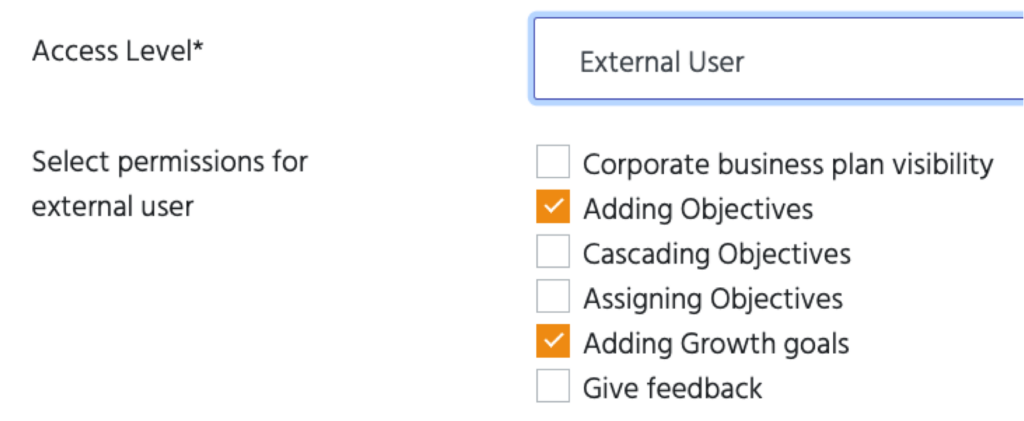
- Select the access level the user will have; Normal, HR, CEO, Board Member, Admin or External User (access can be further defined at the functionality level for some user types to specify which aspects they will have access to)
- Corporate Business plan access can also be assigned here to any user, either with visibility only or write access (this allows users who are not the CEO to be able to add objectives in behalf of the CEO)
- Users assigned as Board Members will be able to have a Board Role defined and assigned to them (see Creating Board Members and Roles)
- If the ‘Send email now’ is checked, this will send an invitation email to the email address you’ve added for this employee, inviting them to set up a password to access Kendo.
- Otherwise, uncheck the box and you can save and send an invitation later.
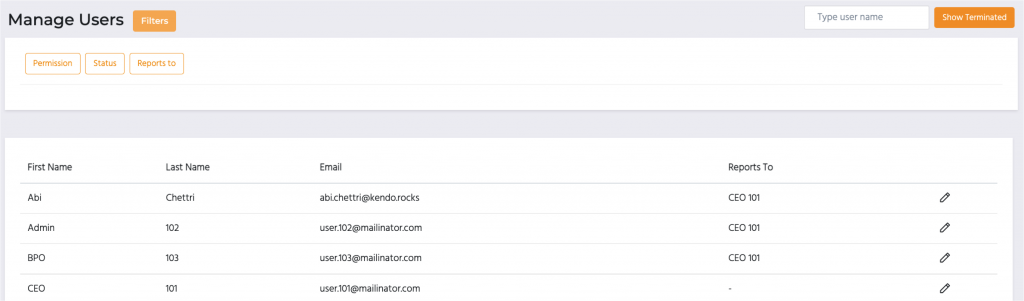
Manage or Edit Existing Users
- From here you can:
- Search for a user by name or filter by Permission type, Account status, or who they report to
- Edit user details, including their name, email and who they report to
- Terminate a user when their account is no longer needed
- View terminated accounts
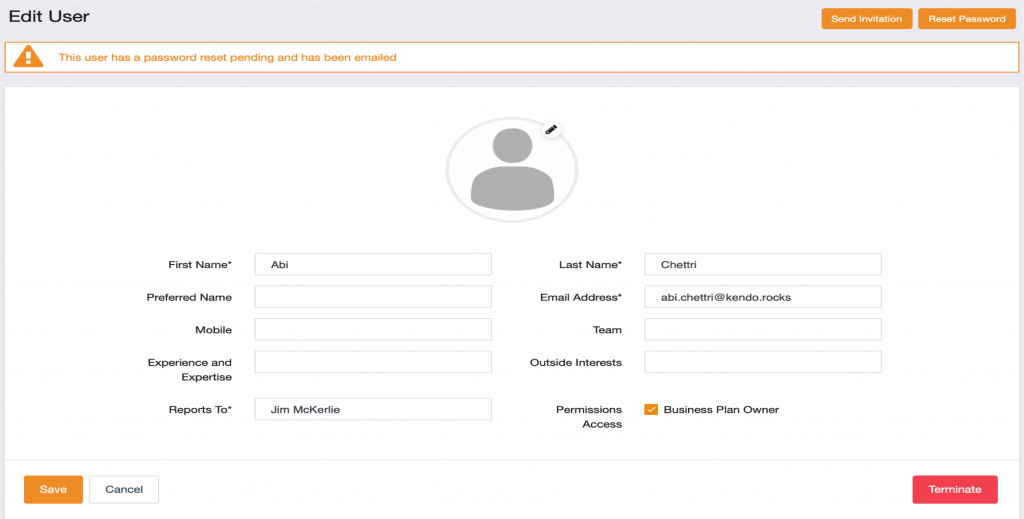
- Edit the user from the ‘Manage User’ page by selecting the pencil icon
- Change any of the details related to this user including adding a profile photo and assigning them Business Owner permission (which gives them access to the business plan)
- Send the user an invitation which will send an email to the user to set up their password for the account
- Reset the password for the account allows you to reset the password yourself or send the user and email to reset
- Terminate the user makes the user inactive
Terminating Users
- You can terminate a user’s account when the account is no longer needed by that user, such as when they leave the organisation
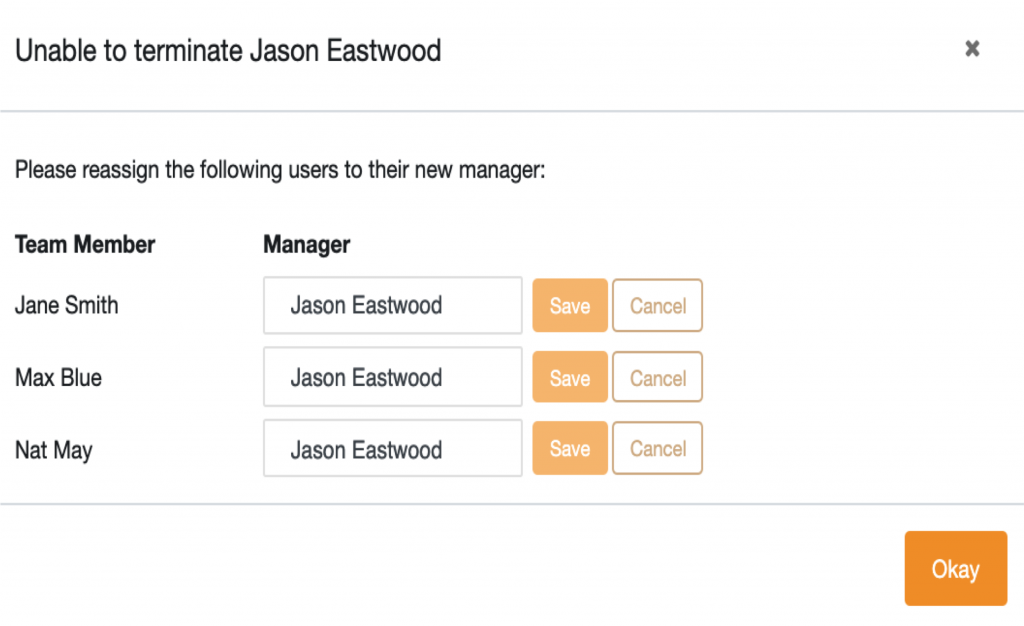
Terminating a user with direct reports
- If you terminate a user who has other users reporting to them, a message will appear indicating that these direct reports will need to be reassigned before you are able to terminate this user
- Reassign each of those direct reports to a new manager and you will then be able to terminate this user
Terminating a user with Current objectives
- If you terminate a user who has current active objectives, you will be prompted to reassign or close those objectives
- Reassign objectives when someone else will continue to work on that objective as it is currently defined. Reassigned objectives will be agreed by the new owner
- Close objectives when no one else will be working on that objective. All pulse and actuals data will be saved and accessible from the objective
- Administrators can notify the manager when they close an objective is closed

Deleting Users
- If a user has not accepted their invitation to Kendo they can be permanently deleted from the system by clicking the Delete user option
- Once the user accepts the invitation the option to delete the user will be removed, however they can still be terminated.
